The existing Android Emulators are all very complex in setting up and are mostly charged for a premium account. Here today I would like to introduce this new tool called Nox App Player which is among the fastest I have used and is very easy to install. It is also totally free of charge.
So, here are the steps to connect Android Studio with Nox:
-
Download and install Nox App Player from their official website where there’s the latest version: Nox APP Player_Best APP Player Ever
-
Start Android studio and create a new project.
-
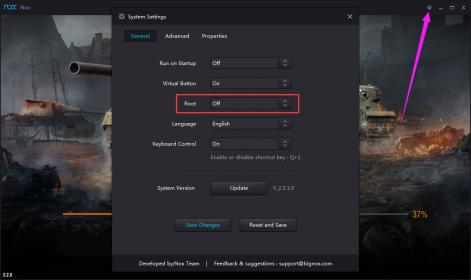
Start Nox App Player, go to Nox system settings >> turn root mode on >> save changes and restart Nox
(Note: Nox is defaulted to start in tablet mode, you could choose here in System Settings >> Advanced >> Startup as Phone to better emulate the Android phone experience)
-
Go to Android settings in Nox >> About Tablet >> Keep clicking Build number until it shows that you are now a developer >> go back to Android settings and you will find the developer options now.


-
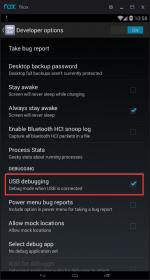
Go to developer options >> tick USB debugging
-
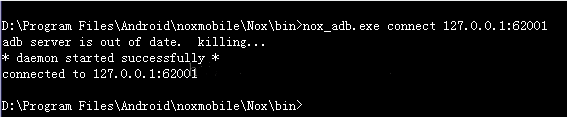
Now run cmd and cd command to the bin folder under the installation path of Nox App Player, input this command: nox_adb.exe connect 127.0.0.1:62001. You will see a successfully connected notice in cmd.
IF: it shows null or offline, just re-start Nox and try again
-
Now Android studio will detect Nox.
This is also applicable in Eclipse.